Building a Side Projects Directory Using GitHub Actions
Here's a way to add side projects to your static-site generator (SSG) portfolio site by just pushing to GitHub!
The Problem #
I am currently converting my portfolio site from one built with Jekyll to 11ty because I want to get closer to knowing how every line of code in my site works, and right now I am far more capable and motivated to do that with a Node.js code base than one written in Ruby.
While I'm at it, I decided to try to fix one element of my workflow I've been unhappy with. There are many side projects and toy sites that I like to include on my personal site, like this Pantone color picker and map animator or this SEO Checker (a prototype I'm developing to help my colleagues at netamorphosis). It's nice to have my personal site there as a kind of scratchpad for projects that aren't ready for prime time yet.
Because I am still pretty new to building out these projects and managing Git repos, I have not yet found an elegant way to copy my side projects' site directory (they're nearly all static sites) to my portfolio site's directory. So I have been committing code to my side project's GitHub repo, copying it, and uploading it to my portfolio site's repo using GitHub.com's GUI. I don't know much, but it feels like there must be a better way.
I will be spending time learning Make, Webpack, and Rollup to learn how to do this as part of my side projects' build process. But even if I learn the art of build configuration, each of my different side projects would have different "vendor lock-in" configurations to push each project to my portfolio, and I would always need to have my entire portfolio site pulled to whatever machine I was working on. Gross!
The Solution #
Enter GitHub Actions and Netlify. Instead of copying and pasting one of my side project sites manually, let's push code to our side project repo and have Octocat go off and run those errands for us! And we'll do it one better: let's add a custom *specially-named* config file to our side project's root folder, where we can define anything we want about how that side project shows up and gets linked to on the portfolio site!
Portfolio Configuration #
First let's write that portfolio configuration file, since it's the shortest bit:
{
  "name": "SEO Checker",
  "path": "/seo-checker",
  "isExternal": false,
  "isPublic": true,
  "themeColor": "hsl(25deg, 70%, 50%)"
}
This is our minimum viable product for "theming": basically, we're gonna make a link a different color. But feel free to build out this config as much as you like to make each of your own side projects shine on your portfolio site's Work showcase page.
Drop this file into the root of your side project and push it to GitHub so that your remote and local repositories are synced up, because part of our next step is going to be outside of our code editor and in the GitHub.com GUI.
GitHub Action #
Our GitHub Action is only going to automate two tasks:
-
Copying the contents of our side project's
/_sitedirectory into the portfolio site's/work/[project-name]directory -
Copying our side project's
portfolio-config.jsonfile into the/_data/workdirectoryNote: This second step is specific to an 11ty project. The goal is to get your theming data to be accessible to your site/page, but the location will be different depending on your SSG of choice. More details in the last section.
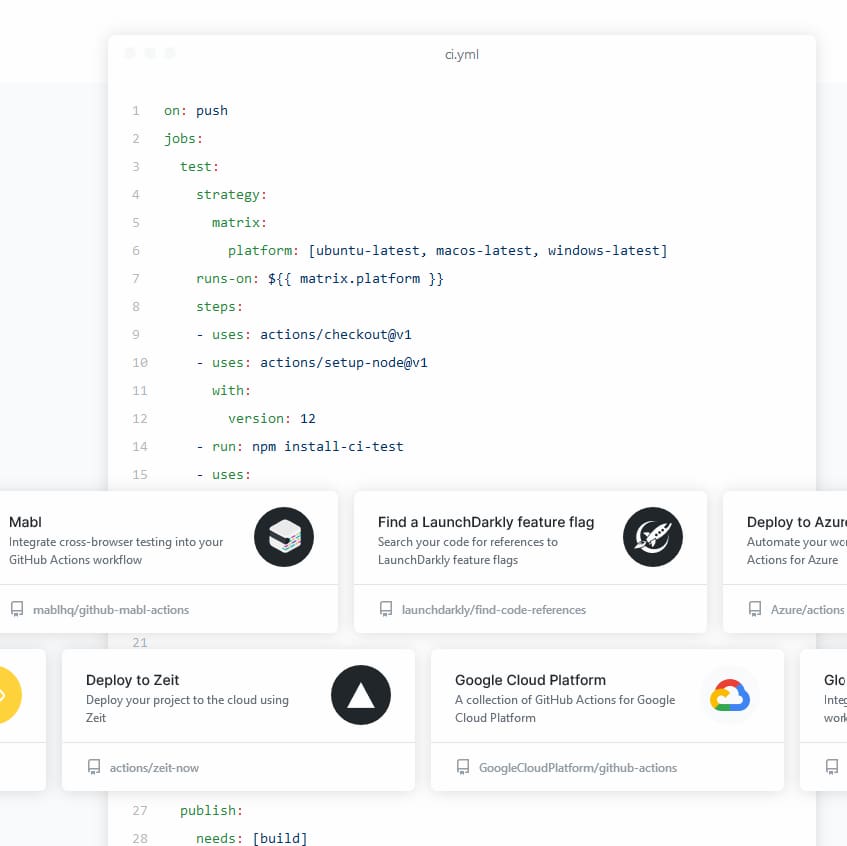
GitHub already has a well-stocked Marketplace of different Actions available to use and remix, and I found a solid option for achieving this process (copy-and-paste across repositories) in the CopyCat GitHub Action by André Storhaug.
Within the root of your side project directory, create a file within the folder structure .github/workflows/main.yml. GitHub Actions use YAML to describe an Action's steps in a human-readable way.
Here is the content within main.yml. We'll step through it below.
# This is a basic workflow to help you get started with Actions

name: Copy to Portfolio and Push to Netlify

# Controls when the action will run. Triggers the workflow on push or pull request
# events but only for the master branch
on:
  push:
    branches: [ master ]
  pull_request:
    branches: [ master ]

# A workflow run is made up of one or more jobs that can run sequentially or in parallelå
jobs:
  directory:
    # The type of runner that the job will run on
    runs-on: ubuntu-latest

    # Steps represent a sequence of tasks that will be executed as part of the job
    steps:
    # Checks-out your repository under $GITHUB_WORKSPACE, so your job can access it
    - name: Checkout p1
      uses: actions/checkout@v2

    - name: Copycat Directory
      uses: andstor/copycat-action@v3.0.0
      with:
          personal_token: ${{ secrets.PORTFOLIO_SECRET }}
          src_path: public/*
          dst_path: work/map-animator/
          dst_owner: franknoirot
          dst_repo_name: franknoirot.co

  config:
    # The type of runner that the job will run on
    runs-on: ubuntu-latest
    needs: directory

    # Steps represent a sequence of tasks that will be executed as part of the job
    steps:
    # Checks-out your repository under $GITHUB_WORKSPACE, so your job can access it
    - name: Checkout p2
      uses: actions/checkout@v2

    - name: Copycat Config
      uses: andstor/copycat-action@v3.0.0
      with:
          personal_token: ${{ secrets.PORTFOLIO_SECRET }}
          src_path: portfolio-config.json
          dst_path: _data/work/mapAnimator.json
          dst_owner: franknoirot
          dst_repo_name: franknoirot.co
First we name our Workflow and what triggers it. In our case, this will run on any push or pull request to the side project, but you could also add in a tag list so that it only runs on proper "releases". This is helpful if you'll be doing a lot of development on your side project and don't want to eat up your build minutes on GitHub.
Then we describe our list of named Jobs. The CopyCat Action we used above doesn't seem to like being used twice in the same job. So I've split out our two copying operations into two jobs, "directory" and "config", but eventually I'd like this to be one step.
In both Jobs we do three things:
- Define what platform the Job runs on
- Checkout the side project's repo to our workspace using the standard Checkout Action
- Copy what we want to into the portfolio's repo using the CopyCat Action
In the first job, I've used an "*" to select all the contents of the public folder for my source path (src_path) and added a trailing slash to the end of a new folder that will live in the work/ directory of my portfolio site. This is so I can rename the public/ folder to the map-animator/ folder, allowing the URL of my side project to be /work/map-animator within my portfolio site.
In the second Job, I've added a needs: directory statement. The second limitation I ran into with CopyCat is the Action doesn't seem set up to be able to be run in parallel, which is the default if you define multiple Jobs within your Workflow. I am eager to fix this, because it nearly halves the time it takes to run the Workflow when run in parallel. In the meantime, this needs statement makes the second Job not fire until the first one finishes, eliminating the merge conflict error I was getting.
One further note on the second Job is that CopyCat allows you to specify files as well as directories and rename them by setting a different file name in the dst_path field. Thanks for that feature, André!
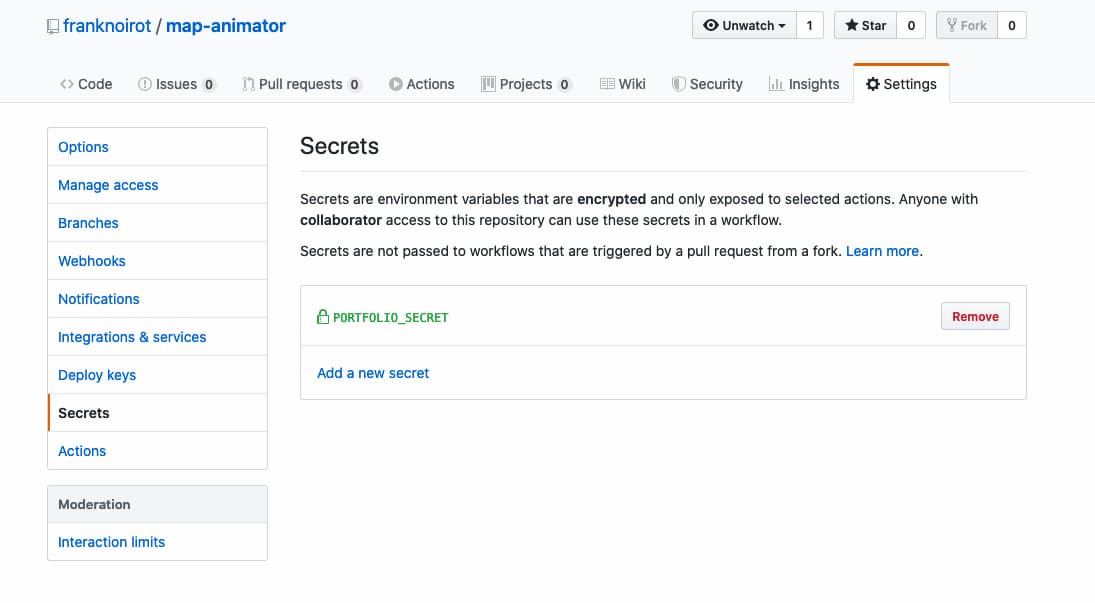
Personal Token #
The personal-token key is needed if you use CopyCat to copy across directories. To set one up, visit the Personal Access Tokens section of your Developer Settings page on GitHub.com and select Generate New Token. Select the workflow permission for this token (or more if you're doing fancier stuff), either naming it something like "Portfolio Actions" or a speciic name for each side project. This is a good solution if you're concerned about the security of these Actions.
Copy the generated token into your side project's Secrets section under the Settings tab and name it something appropriate like "PORTFOLIO_SECRET". This variable is now available to GitHub, including in your Workflow setup (defined above).
We've now finished writing our config file and adding our GitHub Action. Here's what our final code base should look like in our side project repository:
.github/
  | workflows/
    - main.yml
.portfolio-config.json
_site/ # this is where 11ty spits out its static files, may be different for your SSG

# ...rest of project code
Push this code to your repository and watch what happens in the Actions tab of your repository on GitHub.com. If all goes well, switch over to your portfolio's repository and see the changes made and committed there!
After you have that working, you can begin hosting your portfolio site on Netlify, But that's not all: Because we live in the future, you will start getting automatic rebuilds on your portfolio when you push to your side project's repo. Magic!
Bonus Round: Using Portfolio Config #
Sometimes I want projects to be stored on my portfolio site but not yet publicly available through a link. What we've just built is perfect for that. But what if you do want a link to each of your side projects on a Work landing page and don't want to have to add code to your portfolio site every time you add a project? portfolio-config.json to the rescue.
What you're about to see is specific to 11ty using Nunjucks to template out pages, but the steps for getting this to work generally are:
- Create a
portfolio-config.jsonfile for each side project within its own repo - Use GitHub Actions to copy that file into the portfolio's directory somewhere where it can be used as global or page-level data while building the site
- Write templating logic to loop over those JSON data files and convert them into components or elements on the page
For my site I copied each portfolio config into a work folder within my _data/ directory. 11ty grabs any .json files placed in this directory and makes it available within your templates as an entry within a global data object.
So in my work.njk file I have the following template logic:
<h1>My Work</h1>
<ul>

{%- for i, workItem in work -%}
{%- if workItem.isPublic -%}
<li>
  <a href='{% if workItem.isLocal %}/work{% endif %}{{ workItem.path }}'
  {%- if not workItem.isLocal -%}target='_blank' rel='noopener noreferrer'{%- endif -%}
  style='color: {{  workItem.themeColor }}'>
    {{ workItem.name }}
  </a>
</li>
{%- endif -%}
{%- endfor -%}
Here we see Nunjucks + 11ty two-fold magic. First, 11ty takes any separate JSON files within a subdirectory of _data and adds each as an entry within a data object with the work directory's name. So if your file's path is _data/work/mapAnimator.json, then work.mapAnimator is accessible on that object. Second, within Nunjucks you can iterate over the keys of an object just like an array, in an implied sort of Object.keys().forEach().
We iterate over each item in the work/ directory and refer to it as workItem. If the isPublic attribute is set to true, we create a list item and link for the side project. If the isLocal property is true, we allow the path attribute to be the destination of the link and open the link in a new tab, otherwise we tuck it under the /work/ subdirectory. This allows us to hide private or in-progress projects and include portfolio configs for client work where we don't own the codebase or don't want to put personal code inside.
The inline styling of the link's color is my glorious minimum viable product for theming. As small a gesture as it may be, it does have a lot of flexibility because it allows for any color value CSS will accept. I would recommend you use the platform and accept everything the target language (in this case, CSS) would accept with any configuration you build in. When you build your own, you should feel free to add configuration for layout, descriptions, and images of your side projects. Make it snazzy.
Conclusion #
This site's Work directory operates on this system, so check it out live or view the source code. I am really excited about the future of static build tools that chain together, because they feel easier to understand and work with. They can add up to more than the sum of their parts and turn out surprisingly elegant workflows.
If you end up building something like this or improving on it, or have an edit for this piece, please reach out to me. This is my first blog post, and I'm really excited to talk to developers.